Friday 20 May 2011

A Bit More Time to Sunset

In my post of 2nd May (Time to Sunset), I was showing the movement of the sun before sunset. It was part my passing-of- time-in-one-picture idea. I had photographed the position of the sun every 10 minutes over 90 minutes before sunset and then combined the images to show the movement of the sun over that period. I really liked the resulting image and thought that I would have another go, but this time for a longer period.

I used the same position shooting through the bedroom window as before, looking out across to the horizon between some trees. I shot every 10 minutes for almost 3 hours, but some of the shots were with the sun behind the trees, so in the end I only used those pictures taken over a 2 hour period. I combined them to get the image below.

A rather nice effect shown in the picture is the rainbow fringes above the images of the sun. These were caused, I think, by the window glass and the fine dust particles on the glass. 
Although it was created in the same way as the previous picture, this one has quite a different feel. I like it, but I think I probably like the original best. What do you think?

Monday 9 May 2011

A Drop in Time

My blog is called ‘The drip drop of a ticking clock’. Well we have had the ‘ticking clock’, so I thought it was about time to have the ‘drip drop’. I am still capturing time in one picture, but for this picture the time being captured is around 1/2,000 sec.

I have for years been amazed at the shots you can get with high speed photography, so I thought I should look into this for my blog.
The first photographs of real high speed action were taken by Harold Edgerton. His milk drop picture is really well known. The splash of the milk drop is so quick nobody realised how amazing it was until Edgerton’s picture froze the motion. Even more amazing was the bullet and the light bulb.


Originally Edgerton wasn’t even a photographer. He was an electrical engineer working at MIT in America. He invented the photographic strobe or electronic flash. He had been using a stroboscope for scientific research and turned it to point at everyday objects. This led to its development as a photographic tool. The thing that made it important for high speed photography was the speed of the flash. It was an amazing 1/1,000 sec at a time when camera shutter speeds were much slower. Eventually he got this down to 1/1,000,000 sec.

I certainly wanted to try out the idea, so I decided to look at water dropping onto a water surface. But Edgerton’s original picture has been done so often now, I thought I would do something different. The crown effect is achieved by dropping liquid onto a thin layer of the same liquid. I wanted to create a spout of fluid, so I decided to use a bowl of water.

The main problem with taking the Edgerton type picture is the high speed trigger. Today this is usually a laser or sound device. The speeding bullet or falling drop cuts across a laser beam which triggers the flash. Or if you are breaking a light bulb the noise of the shattering glass is picked up by a microphone which triggers the flash. But getting hold of a trigger circuit is difficult and you usually have to build your own. I didn’t have the time or skill to do this so went for something a lot simpler.

I set up a drip onto water in a glass bowl and back-lit the scene with a soft box with a 250 watt strobe. The strobe flash speed was about 1/2,000 sec. I then took pictures of the scene with a digital camera linked to the strobe. The great thing about digital is that you can take an awful lot of pictures at no cost and can see the results straight away. I couldn’t synchronise firing the strobe with the water drop hitting the water surface, but I felt that if I shot the scene enough times I would get something interesting. I also use the rapid shoot feature on the camera to increase my chances of success. Out of around 70 shots I got 4 really interesting pictures. They are shown below.


I love the glassy look to the water spout in picture 2 and the ripples on the water surface in picture 1. Picture 4 is the droplet crown you get with a bowl of water, rather than a thin layer of liquid. I was really pleased with the results. Hope you like them too.

Bibliography


Sources of pictures


Monday 2 May 2011

Time to Sunset

I have got rather hooked by the passage-of-time-in-one-picture idea, so I thought that I would try another one.

There is a great view to the horizon from one of our bedroom windows. The view has large trees on either side and at this time of year the sun sets at a point on the horizon that can be seen from the window. I thought that it would be interesting to track the position of the sun from higher in the sky to sunset. I would take shots every 10 mins and combine them to create a picture with a series of bright patches fading to deep red as the sun approached the horizon.

The only problem about the pictures was that I would have to shoot them through double-glazing as the window cannot be opened. I had to be very careful not to create reflections on the glass and avoid a double-image cause by internal reflections between the two panes of glass. But I thought the potential image was worth the hassle. In all, I took 8 pictures every 10 mins before sunset. I had a timer to tell me when the next shot was due. Unfortunately, the timer didn’t ring for one shot, so there was a gap in the sequence.

I merged all the shots in Photoshop to get a combined picture, but felt that the images of the sun were too bright – there was too much glare. So I reduced brightness and also colour temperature, which then gave the picture a rather surreal feel. The final image is shown below.  


Where the sun is higher in the sky it is brighter and creates a bigger impression on the camera detector. This was deliberate. I didn’t reduce exposure to get a clean disc of the sun. As the sun sinks it loses strength and the bright patch reduces. When the pictures are combined the effect is a bright blob getting smaller and redder as it moves towards the horizon. I think this gives a greater feel for the passing of time – the passing of a sunny day or the passing of a warm afternoon.  Also, a breeze sprang up during the shoot and started to move the leaves on the tree to the left of the picture. You can clearly see the effect. This is another indicator of time passing.

So what about the missing shot. I could have ‘corrected’ the picture with a simple digital edit and added another image of the sun at the missing point. But I didn’t think that was really acceptable. So I thought I would reshoot the sequence. But then I thought maybe the picture looked better without the shot anyway. In terms of composition, the two sets of blobs make for quite a good picture. The gap is also a comment on the passing of time. It’s that point in the day when the cool of the evening starts to be noticeable. So in the end, I decided the picture would be my blog post for this week. Hope you like it too.

Monday 18 April 2011

That Pendulum – at last!

It has taken a little longer than I wanted, but the pendulum picture is done at last (see my post of 5th April). The picture is part of my idea to capture the passage of time in one picture. I wanted to show the swing of the pendulum with a series of rapidly taken shots using the high speed shoot feature on my camera. Each image would be separated in time by only a fraction of a second and combined to make one image using Photoshop.

The idea of taking pictures of a swinging pendulum is not new. Two such pictures are shown below:


But these images are not of a swinging pendulum (or watch). They were both digitally created by taking a single pendulum image and duplicating and manipulating the image. They are interesting pictures, but they don’t capture time. My idea really does capture time in one picture.

I used two 275 watt photoflood lamps to light the pendulum in our long-case clock. I originally wanted to use daylight, but there just wasn’t enough light for the technique I was using. This was my original problem. With the photofloods it was fine. I set the pendulum going and took the high speed pictures – 8 per second. The shutter speed was 1/160 sec to freeze the motion in each shot. I then selected the images for just one swing of the pendulum and combined them using Photoshop. The result is shown below:


You will see that the image of the pendulum is semi-transparent in places and with high reflection. I wanted these effects so that they increased the feeling of the rapid passing of time. The images are fleeting. You also get the reflections of the pendulum in the polished wood of the clock case as a bonus!

Now I should say something about why this does actually show the capture of time. The fake pendulum swinging shots show the images of the pendulum evenly spaced. Your GCSE physics will tell you this is not so. The pendulum speed slows as it comes to the end of each swing and is fastest in the mid-point of the swing. So the images should be close together at the ends of the swing and further apart in the middle. Have a look at my picture and you will see that that is just what is shown.

The only problem with this way of taking pictures, is that image quality suffers. Instead of the 12 megapixels the camera can normally do, these rapid-shoot images are only 3 megapixels.

Anyway, I hope you think the picture was worth waiting for!

Pictures from the web:


Monday 11 April 2011

Getting Closer

I’m taking a break from the ‘passing of time in one picture’ and looking at other ‘Things you never see’. Although for this post it is things you see all the time, but not quite in the way they are shown in the photographs.

I always liked those photographs you used to see in children’s science magazines of objects taken from unusual angles and you had to guess what the objects were. I thought that I would take up that idea, but using close-up photography. Also I wanted my pictures to have a lot more interest and style about them than the old science photos. I wanted them to be interesting pictures in their own right – rather like abstract art.

I used the super-macro feature on my camera to get up close. I find that you can get in surprisingly close using this feature. It is almost like looking through a very strong magnifying glass. To give you a clue, all the objects shown were taken in our kitchen. But first of all, please decide whether you think they are interesting photos, then try and guess the objects. Answers are at the bottom of this post – but no peeping there first!


Now scroll down for the answers


Keep on going


Down a bit more


A bit more


Speaker grille from a CD player, Dish brush, Fork, Kitchen paper towel.


How did you do? Did you like the pictures? Please let me know. Thanks.

Tuesday 5 April 2011

Time in one picture – with clocks!!!

Since capturing time in one picture is all about the passage of time, I thought that a most appropriate subject for my next pictures would be clocks – or parts of clocks.

I have always been fascinated by the long-case clock we have in our hall. It has a bright brass pendulum that gently swings side-to-side. Capturing the motion of the pendulum just as a blur didn’t seem too interesting, but capturing its motion in the same way as I captured the motion of the cars on the M3 (see my post of 27th March) seemed to be a good idea.

For the motorway shoot I used the high speed shooting option on the camera (around 20 pictures per second) to create a series of pictures of the cars passing by in a short space of time. When all the pictures are overlaid on top of each other (using Photoshop) you see the motion of the cars as a series of individual images. I thought that using a similar technique with the pendulum, I could capture its motion also as a series of images.

Although I had hoped to have the results of this idea on the blog this week, I hit some problems which I am still working on. So unfortunately, it’s still work in progress, but I will let you know how it goes. I know you could just hold the pendulum in different positions on its swing and take a series of shots, but I didn’t think that this would give the effect I was looking for.   

While I was thinking about the pendulum, I also had another thought. How about showing a clock over a 12 hour period? But it wouldn’t be a smear of hands round the clock face like in a long exposure. I would take a picture at each hour and then combine the 12 shots. It is the same idea as the pendulum picture, but the time between each shot is an hour instead of a fraction of a second. The minute hand would always be pointing at 12, but the hour hand would show at all the numbers round the dial. So that is what I did. I used two strobes to light the clock face. The 12 shots I took were combined with Photoshop to give the picture below.


I really like the result and think that it has something of a surreal feel about it. You can imagine Man Ray might have done something like it.  I would like you to think that this picture did take 12 hours to make, but of course it didn’t. I just moved the clock hands round manually. Bit of a cheat.

I did some research into this idea on the internet, but again was surprised to find little that helped. I can’t believe that the above idea hasn’t been done before. Anyway, hope you think it’s fun too.

Sunday 27 March 2011

More Time in One Picture

The work of Alan Grinberg with his Sunset over the Pacific (see my post of 13th March) really got me thinking. It’s a great picture. For my Day-to-Night in one picture, my subject was the back of a large house (see my post of 16th March) with a smooth transition from day to night, but I thought I would do another picture, with a different subject, using a highly-segmented image like Grinberg.
We don’t live by the sea, but we do live near a Motorway (M3). Instead of the glow of the sky at sunset over the sea, maybe it should be the glow of the sunset over car tail and headlamps. But just opening your shutter and letting the car tail and headlamps smear has been done too many time before – like the image below. This is not very original.


My idea was to shoot the same scene of the motorway every few minutes as it got dark, so that there would be a glow in the sky at first from the setting sun going through to darkness. The car headlights would streak more and more as the exposure increased with the increasing darkness. I would then segment the images as in a Ginberg picture.

When I got down to the bridge over the motorway and looked at the scene, I realised my original idea wasn’t so good. The road and the lights disappearing into the distance weren’t going to suit the segmented style. So I tried something different. Instead of shooting every 10 mins, I shot very rapidly by selecting the ‘high-speed shooting’ option on the camera I was using. I was shooting something like 20 pictures per second. I then merged all the pictures with Adobe Photoshop to create one final picture with the cars now shown not as streaks, but as a series of images one-after-the other. This captures time in quite a different way.  Three pictures created this way are shown below.


In the first two pictures Photoshop auto-aligned all the merged photographs very well. In the third picture, the original images are so dark, auto-align didn’t work, but still left me with a great picture. This one I really like.

I was really pleased with all the results. I am sure this technique has been done before, but I couldn’t find any images on the web like them. Hope you like them too.  


Wednesday 16 March 2011

My Day-to-Night in one Picture

I thought that I would try to do a ‘day-to-night’ panorama in the style of Krzywinski. (see my post of 13th March). But I didn’t have easy access to great photo positions overlooking a city. So I decided to shoot a wide building at ground level with windows that light up as darkness falls. I chose a large house with a conservatory, but the rear garden was steeply sloping, so the camera angle was quite steep. I couldn’t get the house in one shot even with a wide-angle lens, so I did it in three shots, with the idea that I would use the Photoshop panorama tool to join up the three shots.

I started to take pictures late afternoon (4 pm early March) with a strong, low sun lighting up the bushes and a palm in the garden. As it started to get dark, the lights in the house were turned on in all the rooms at the rear of the house. I took a set of pictures every 10 minutes until it was getting quite dark (6.40pm). I had 16 sets of 3 pictures.

The idea was to create 16 panoramas and then slice up each panorama into 16 sections. One slice would be taken from each panorama to make a new day-to-night panorama.  Slice 1 would be from panorama 1 (sunlit) and slice 16 would be from panorama 16 (night).  I started to do this but the results were looking rather odd and Photoshop wasn’t so good at joining the slices up. I realised that what would look better would be something much simpler – three time segments that covered the three sections of the house.  The right hand side of the house would be in daylight, the central part at dusk and the left hand side at night. So I selected the appropriate shots from the 16 sets of pictures (shot 1 picture set 1, shot 2 picture set 9 & shot 3 picture set 16) and joined with the panorama tool. I made some adjustments with the transform tool to allow a little for the steepness of the camera angle and the crop tool to give me a neat-edged picture. I did some minor cut-and-paste edits and it was done. Well I hope you managed to follow all that! The result is shown below.


I may still do a bit of work on the right hand side of the picture to improve the distorted (by camera angle and Photoshop panorama tool) horizontals. The window top , gutter line and roof line might look better if they were parallel.

Now what I have noticed in the other day-to-night pictures that I have seen, is that time goes from left to right in the picture. Mine goes from right to left. Does this matter, does this feel odd? What do you think? Answers to my blog please.

Camera:
Olympus E-410 DSLR, 14mm lens (28mm, 35mm equivalent), tripod mounted.
Set at ISO 100. Night pic: 1.6 sec at f3.5. Dusk pic: 1/10 sec at f3.5. Daylight pic: 1/125 sec at f6.3.

Sunday 13 March 2011

Day to Night in one Picture

I have been looking at other ways that photographers capture time in one picture. I rather like those pictures that show a scene where one side of the picture is spring and the other is autumn or winter. A year may seem a long time for a picture, but I found the photographer Michael Wesely specialises in photographs that take several years! Well I can’t wait years or even one year, so I looked for people that capture a day in one picture. Martin Krzywinski, a Canadian biochemist and photographer, has taken some interesting day-to-night photographs. He has a passion for this sort of photography. I really like his panorama of Vancouver. The time each part of the picture was taken is shown at the top of the picture.


The final image captures a period of 3hrs 40 mins, but time is not even across the picture. Over half the image covers just half an hour as it was getting dark.  A total of 60 pictures were taken to create the final image. Another of his images is his dawn to dusk image of a bridge with a wide road over a river. Here he used just 16 pictures.


There seem to be a number of ways these pictures can be produced, but the easiest is to shoot a series of pictures of the scene over time and then select a strip from each picture – each strip being later in time than the previous one selected. You then join up the selected strips with a program like Photoshop.

I also liked the work of Alan Grinberg. Alan is a textile designer and photographer, who lives in California. He specialises in taking landscape photographs. His time pictures are rather different from Kryzwinski. He cuts his pictures into time strips, but joins the selected strips without any program to smooth the joins. The results can be amazing. His sunset over the Pacific Ocean is shown below.


I think all these day-to-night pictures are really interesting. They have given me some ideas for time pictures that I can create. Watch this blog for progress.

Sources of information and pictures

Monday 7 March 2011

In the Style of Sugimoto

After having done some research into Hiroshi Sugimoto (see my blog of 22nd February), I decided that I would create my own Sugimoto cinema-style shot. But instead of a cinema I thought I would use our TV and lounge.
I set up the shot so that the TV would light up the fireplace and soft furniture. This meant that the TV is off centre in the picture. I was shooting with an Olympus E-410 DSLR on a tripod with the lens set at 14mm (28mm lens 35mm equivalent). I chose the smallest aperture (f22) and slowest film speed (ISO 100). The camera was set to manual focus. I did a number of exposures, but found that I was getting the effect I was looking for with an exposure of about 3 minutes. I shot the scene in RAW so I would able to make further adjustments to light levels in Photoshop.

When I downloaded the pictures onto my laptop, I was pretty pleased with the results, but with a bit of adjustment with Photoshop I found I could do even better. So the final light levels are about what they would have been had the exposure been for 4 minutes. I like the final result, but it doesn’t quite have the same eerie feeling as the Sugimoto original. So I thought that I could improve things by killing the colour and printing it in black and white. Both colour and B&W are shown below. Which one do you like? Which one gives that spooky feeling best? Answers to my blog please.


Saturday 5 March 2011

Websites Review

I have started to look at the good and bad sides of websites. I first thought about the sites that I like and why I like them.
One site that I use quite a lot is the Apple website (http://www.apple.com/uk ). I like looking at their stuff and what’s new. It is not just because of the cool technical stuff they are showing, but also the way it is displayed and the ease of getting around the site. The opening page is simple and clear and does not feel messy, yet there is plenty of information. I think the white background helps to give the uncluttered look. The pictures of the equipment they show are eye-catching – you feel you want to know more and go further into the site.


No matter how good the website looks or how good its content, it has to be easy to use, to get around and find what you are looking for. Many sites are annoying to use, because they have dead-ends and unclear instructions and links. I think you should be able to find what you want with only three or four few clicks of the mouse at most. I tried this out on the Apple UK site and found I got to the VGA adapter I was looking for in four clicks. So this passes my use-ability test!
Another site that I like is the one owned by Jonathan Pollock (http://www.jonathanpollock.com), a really superb still-life and food photographer. The opening page is so simple, but has a big impact. The photograph of the biscuit box with the biscuits alongside is just brilliant, but then the whole page reflects the colour of the box in the photograph. The simple, clear lettering of his name, contact details and the site contents are just right.


What is really good about the contents headings/links is when you run the mouse cursor over each link, the photographs on the page that you have selected are displayed in a series of mini-photo squares alongside the link. It is preview of what is to come – and you can select from the mini-photos if you wish. Navigation is really easy and interesting.
The Apple site is all about technical equipment and the Jonathan Pollock site all about good photography and advertising images. Other sites I use are just lots of information. So this is difficult to do without the site being confusing and boring, but the BBC website (http://www.bbc.co.uk) I think does it quite well. The opening page has a lot of information, but it is well organised with good images. To see the whole page you have to scroll down, which I am not so keen about, but that is a minor objection. The first thing you see on the opening page is a large colour picture showing a TV programme or a news item, but this picture can be changed by running your mouse cursor over other lead stories shown on the right hand side of the page. Below this are neat boxes for News, Weather, Sport etc – all easy to see and find. It’s rather like an electronic newspaper, complete with articles by leading BBC reporters. Again, the site has a white background, which I think works well if you have a lot of text and stuff. The articles that the reporters write have very simple layouts. It’s just text on a white background in well-spaced lines. The font used is Verdana, which has wide letters that are easy to read off the computer screen. Fonts such as Calibri or Verdana are easier to read off the screen than traditional fonts, such as Times New Roman, used in printed media.  Background images, colours and arty fonts may look good, but can you read the text easily and quickly? If the layout and design are getting in the way of reading and understanding the text, then I don’t think it can be good design.  In case you are wondering, this text is in Calibri 11pt.


Now we come to sites that I don’t like. I suppose I like well-constructed sites and leave the poorly designed ones alone if they don’t immediately appeal. I would only go further with those sites if I absolutely need information from the site. This says something about the importance of design. If you don’t get the design right, people are less likely to use your site. I don’t have a list of poor sites, but I looked around and came up with an example.


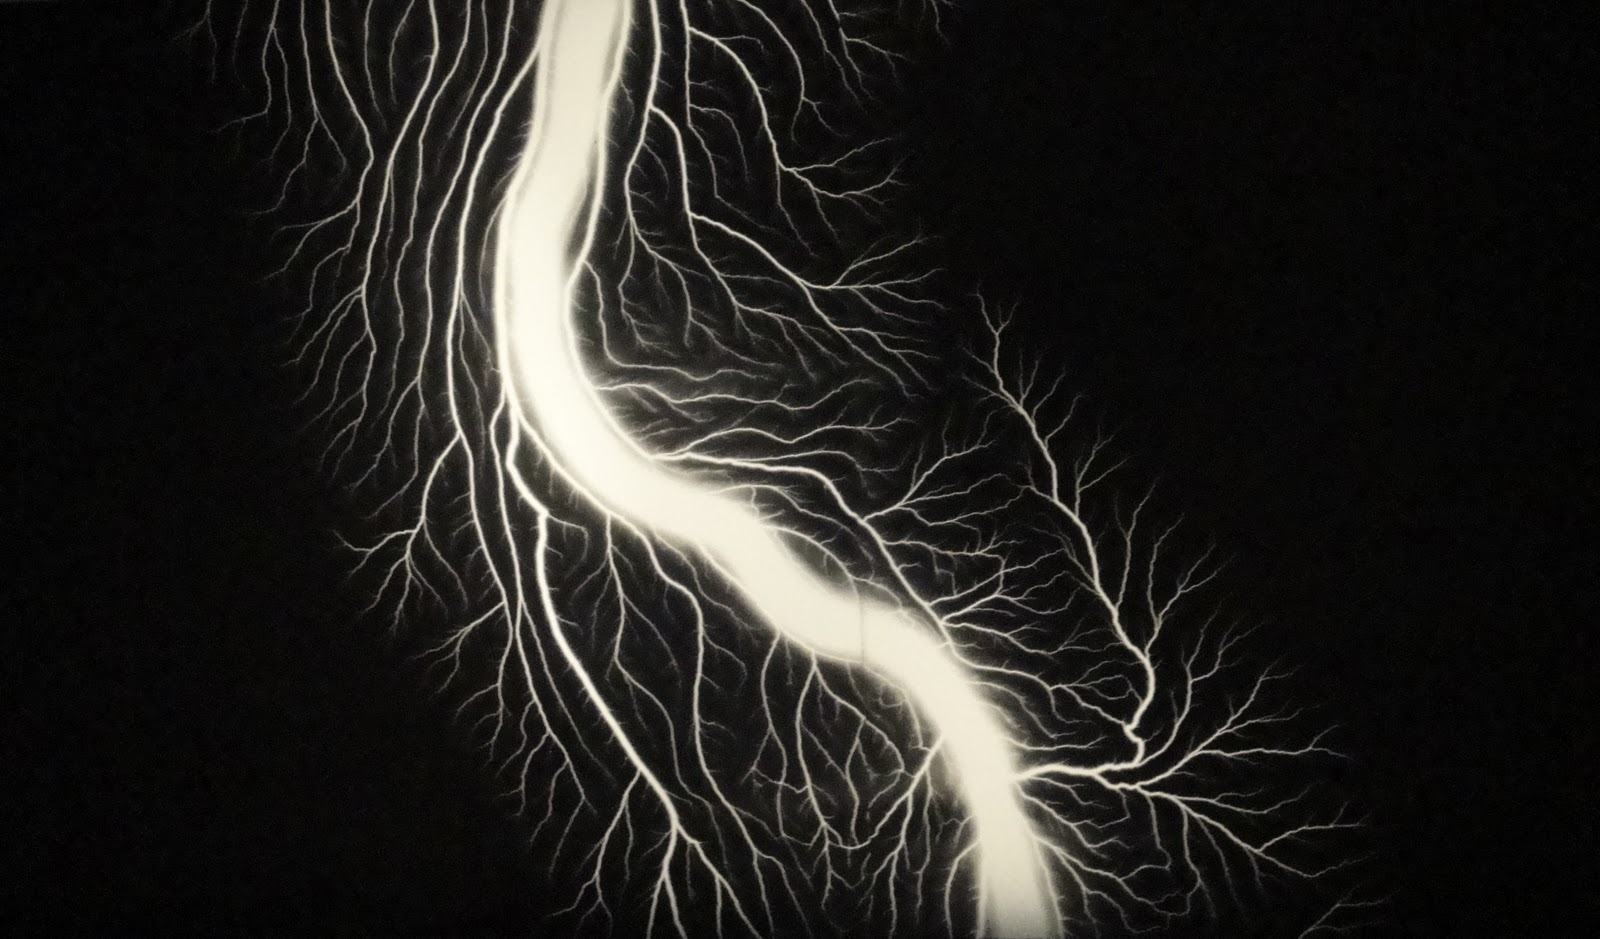
The site looks cluttered without giving much information. It isn’t even immediately clear what the site is about. The black background doesn’t help here. The text on the left is disjointed and not in a screen font. Illustrations are poor. The credit stuff text on the right is a bit small and the background is some sort of repeating (tiled) star-pattern, which looks very poor. I suppose the author doesn’t worry too much about design, he just wants to get his thoughts down. If you are into ‘Outcasts’ you may find the content interesting, but this site wouldn’t grab anybody’s attention if it was down to design alone.
So, what do these sites tell me about what I think makes a good website.
First of all there has to be interesting content –  with good  images, descriptions and information. Even if your design is great, people will soon tire of the site if it doesn’t have much to say. Then there is design. The layout and illustrations on the opening page need to be good, to give the feel of a user-friendly site with interesting content. You want people to feel they would like to go further into the site. The other pages also want to be well laid out with blocks of text easy to read. Finally there is the use-ability of the site. How easy is it to get around the site and how quickly can you get to where you need to go? Does it pass the four-clicks test?
Of course, all the above is just my opinion about what makes a good website. Someone else will probably have completely different views and think my thoughts are definitely odd.

Websites reviewed

Tuesday 22 February 2011

Hiroshi Sugimoto

For my first set of pictures I wanted to look at the passage of time. How to capture the passing of time in a single image – rather than a series of separate photographs taken over time.

I have been looking at the work of Hiroshi Sugimoto. He is a Contemporary Photographer, well known for his work in capturing the passage of time in single photographs, particularly with very long exposures.

He was born in 1948 in Tokyo, Japan, and was educated there, but now works in New York City. He says that he has been greatly influenced by the Dada and Surrealist movements and especially by the work of Marcel Duchamp. His work often has a surreal feel about it and is based on the idea that photography is a time machine. It is a way of capturing and preserving memory and time.

For his passage of time work he uses a large format camera (8”x10”) and often extremely long exposures – typically many hours. The work covers many themes, but three are really well known.

The first theme is the interior view of an old-style cinema, where he captures the whole of the film being shown - as in picture below. The length of the exposure is probably around two hours, so all the images of the film combine to make a bright blank screen with even light. The light from the screen gives the seats and wall decorations an eerie glow – a lighting effect that is enhanced by the long exposure.  This is a clever, but simple image. When you stop and examine the picture you see that it does show the passage of time and has a great composition.

                        
Sugimoto is famous for his seascape pictures. They have been used by people for record covers and books. The exposures are usually over a day. His Boden Sea picture is shown below. He simply points the camera out to sea and puts the horizon halfway up the image. The combination of all the clouds that have passed by during the day leave a featureless sky, but interestingly wave patterns on the sea can still be seen. The minimalistic aspect of these pictures really appeals to me. It is a seascape, but in an intriguing way. The sea takes on a particular look – almost like it consists of a liquid much thicker than water.
                              

In his most recent work Sugimoto makes pictures with the electrical discharges from a small Van de Graaf generator. He doesn’t actually take a photograph of the electrical discharge. The technique is to arrange an electrical discharge from the generator directly onto a large photographic dry plate. The picture below shows an amazing image created this way. Here the passage of time is, of course, very small indeed. This is the opposite, in terms of time captured, of the cinema and seascape pictures. Instead of an exposure of hours, here it is only a split second. The results are quite beautiful.


What I have learned from Sugimoto’s work is that passage of time pictures don’t have to be complex. His techniques are very simple, but effective. His work also reminds me that the passage of time can be about very short events – not just those over long periods of time.


Sources of pictures

Bibliography


Wednesday 16 February 2011

First Ideas of a Project.

Here is a mind-map of the ideas that have popped into my head. Over the course of semester 2 I will be putting updates of this mind-map to show how my project is moving on in a visual sense.


Tuesday 15 February 2011

New look for my new blog.


Hey guys, please comment saying whether of not you like what I have done to my blog. Suggestions on how I can improve it are more than welcome.

Well here we go.

This is my first blog, so hopefully it will go well. :D