Monday, 18 April 2011

That Pendulum – at last!

It has taken a little longer than I wanted, but the pendulum picture is done at last (see my post of 5th April). The picture is part of my idea to capture the passage of time in one picture. I wanted to show the swing of the pendulum with a series of rapidly taken shots using the high speed shoot feature on my camera. Each image would be separated in time by only a fraction of a second and combined to make one image using Photoshop.

The idea of taking pictures of a swinging pendulum is not new. Two such pictures are shown below:


But these images are not of a swinging pendulum (or watch). They were both digitally created by taking a single pendulum image and duplicating and manipulating the image. They are interesting pictures, but they don’t capture time. My idea really does capture time in one picture.

I used two 275 watt photoflood lamps to light the pendulum in our long-case clock. I originally wanted to use daylight, but there just wasn’t enough light for the technique I was using. This was my original problem. With the photofloods it was fine. I set the pendulum going and took the high speed pictures – 8 per second. The shutter speed was 1/160 sec to freeze the motion in each shot. I then selected the images for just one swing of the pendulum and combined them using Photoshop. The result is shown below:


You will see that the image of the pendulum is semi-transparent in places and with high reflection. I wanted these effects so that they increased the feeling of the rapid passing of time. The images are fleeting. You also get the reflections of the pendulum in the polished wood of the clock case as a bonus!

Now I should say something about why this does actually show the capture of time. The fake pendulum swinging shots show the images of the pendulum evenly spaced. Your GCSE physics will tell you this is not so. The pendulum speed slows as it comes to the end of each swing and is fastest in the mid-point of the swing. So the images should be close together at the ends of the swing and further apart in the middle. Have a look at my picture and you will see that that is just what is shown.

The only problem with this way of taking pictures, is that image quality suffers. Instead of the 12 megapixels the camera can normally do, these rapid-shoot images are only 3 megapixels.

Anyway, I hope you think the picture was worth waiting for!

Pictures from the web:


Monday, 11 April 2011

Getting Closer

I’m taking a break from the ‘passing of time in one picture’ and looking at other ‘Things you never see’. Although for this post it is things you see all the time, but not quite in the way they are shown in the photographs.

I always liked those photographs you used to see in children’s science magazines of objects taken from unusual angles and you had to guess what the objects were. I thought that I would take up that idea, but using close-up photography. Also I wanted my pictures to have a lot more interest and style about them than the old science photos. I wanted them to be interesting pictures in their own right – rather like abstract art.

I used the super-macro feature on my camera to get up close. I find that you can get in surprisingly close using this feature. It is almost like looking through a very strong magnifying glass. To give you a clue, all the objects shown were taken in our kitchen. But first of all, please decide whether you think they are interesting photos, then try and guess the objects. Answers are at the bottom of this post – but no peeping there first!


Now scroll down for the answers


Keep on going


Down a bit more


A bit more


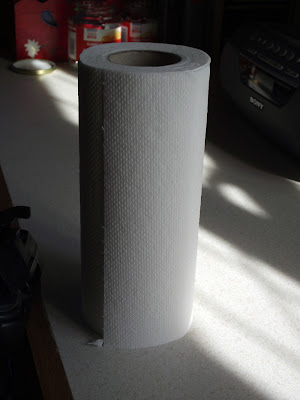
Speaker grille from a CD player, Dish brush, Fork, Kitchen paper towel.


How did you do? Did you like the pictures? Please let me know. Thanks.

Tuesday, 5 April 2011

Time in one picture – with clocks!!!

Since capturing time in one picture is all about the passage of time, I thought that a most appropriate subject for my next pictures would be clocks – or parts of clocks.

I have always been fascinated by the long-case clock we have in our hall. It has a bright brass pendulum that gently swings side-to-side. Capturing the motion of the pendulum just as a blur didn’t seem too interesting, but capturing its motion in the same way as I captured the motion of the cars on the M3 (see my post of 27th March) seemed to be a good idea.

For the motorway shoot I used the high speed shooting option on the camera (around 20 pictures per second) to create a series of pictures of the cars passing by in a short space of time. When all the pictures are overlaid on top of each other (using Photoshop) you see the motion of the cars as a series of individual images. I thought that using a similar technique with the pendulum, I could capture its motion also as a series of images.

Although I had hoped to have the results of this idea on the blog this week, I hit some problems which I am still working on. So unfortunately, it’s still work in progress, but I will let you know how it goes. I know you could just hold the pendulum in different positions on its swing and take a series of shots, but I didn’t think that this would give the effect I was looking for.   

While I was thinking about the pendulum, I also had another thought. How about showing a clock over a 12 hour period? But it wouldn’t be a smear of hands round the clock face like in a long exposure. I would take a picture at each hour and then combine the 12 shots. It is the same idea as the pendulum picture, but the time between each shot is an hour instead of a fraction of a second. The minute hand would always be pointing at 12, but the hour hand would show at all the numbers round the dial. So that is what I did. I used two strobes to light the clock face. The 12 shots I took were combined with Photoshop to give the picture below.


I really like the result and think that it has something of a surreal feel about it. You can imagine Man Ray might have done something like it.  I would like you to think that this picture did take 12 hours to make, but of course it didn’t. I just moved the clock hands round manually. Bit of a cheat.

I did some research into this idea on the internet, but again was surprised to find little that helped. I can’t believe that the above idea hasn’t been done before. Anyway, hope you think it’s fun too.